-
Go green...
-
hmm, its golden colour...
-
Holy colour, yes it white...
-
The Brave Colour is Red only, i think...
-
I Think blue is calm colour...
Rabu, 22 April 2015
Senin, 18 Maret 2013
Labels: ANDROID APPS
Rooting is a process by which you can get root access or administrator privileges to your Android phone and can flash tweaks, custom ROMs, custom kernels, install additional applications which requires root, use firewall etc. If you don’t what exactly root means, I will suggest you to visit here here.
Root will void your phone’s warranty but it doesn't matter you can get it back!
Rooting Samsung Galaxy Y:
1. Download the zip files to your SD Card (not in any folder).
2. Switch off your phone & boot into recovery mode.
3. Press Vol Up + Power Key + Home button together at the same time to boot in recovery mode.
4. Touch screen is disabled here.
5. Use volume keys for scrolling & home button for selection.
6. Select Apply update for sdcard
7. Select update.zip (which you have downloaded).
8. When it shows Install from sdcard complete written.
9. Select reboot system now.
10. Your phone will restart & first boot may take 5 minutes.
11. Check for an application Superuser and open it.
12. Goto Menu > Preferences > SU Binaries.
13. SU Binaries will update.
14. When it get updated, restart your phone.
You’re done! Your phone is now rooted.
Warning: Do not delete Superuser or you will lose your root!
Unrooting Samsung Galaxy Y:
Follow the same steps (1-10) but in place of selecting update.zip under apply update from sdcard in recovery mode, select update-unroot.zip.
Download links for Rooting :
Direct Link 1 : Update.zip ( 2.1 MB )
Mirror Link 2 : Update.zip ( 2.1 MB )
Download Links for Unrooting :
Direct Link 1 : Update unroot.zip ( 99.16 KB )
Mirror Link 2 : Update unroot.zip ( 99.16 KB )
JELLYBLAST V3 for Galaxy Y(GT-S5360)
Labels: CUSTOM ROM
After the biggest success of Jelly Blast Next2ICS ROM v2.0 for Galaxy Y here Presenting the Final & stable version of jelly blast edition JELLYBLAST V3 for Galaxy Y(GT-S5360)


NEW COOL FEATURES:
- Based on DDLF1.
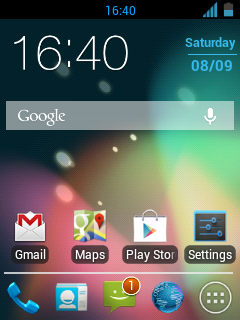
- Totally Dark Jelly Bean themed.
- Each and every icon fine tuned to look like Jelly Bean.
- A new Jelly Bean task manager ( Recent apps list).
- Added Swipe to clear notifications on Status Bar.
- A new, AWESOME JELLYBEAN status bar and notification panel.
- New music app based on stock Touchwiz, but contains DSP equalizer support.
- NEW LOCKSCREENS- Never miss a chance to show off your cool lockscreen.
- OTA FEATURE added. Now users can automatically update the ROM from OTA upgrades, in the settings menu.
- A TOTALLY REVAMPED SETTINGS MENU ,With the following new controls : Statusbar Control, Lockscreen Control, Sound Effect Control, and Quick Toggles Control...finally, your phone is truly yours!
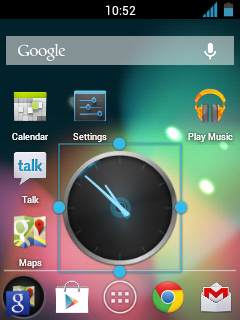
- New Jelly Bean Digital Clock, analogue clock, and Jelly Bean Search Bar.
- New smarter JellyBean keyboard.
- Extented power menu: Now those long processes are long no more!
- Zero delay root access...try and see!
- NEW KURO KERNEL, be it more power for gaming, or power saving mode for Deep Sleep, Kuro kernel takes care of your batteries in the best possible way.
- Battery life megaboosted, last upto 2 days in power saving mode!
- CPU control feature added....high performance or underclock...choice is yours!
- Kernel is suitable for everyone: default settings (conservative + sio ) is battery saving, while bcm + cfq settings give power boost: Antutu score 1957 without any extra tweaks!
- Improved memory management.
- Two awesome launcher choices: You get both HOLO LAUNCHER, and the STOCK Touchwiz launcher, which is Jelly Bean themed.
- Full Screen Caller Mode: Now see your friends in FULLSCREEN while calling them.
- SONY BRAVIA ENGINE added...your pictures are clearer than before!!
- MULTILANGUAGE: Cestina , Dansk, German, Dutch, English ( US, UK) , Spanish, Estonian, French, Gaeliege, Hravatski, Islenska, Italiano, Kazakh, Latviesu, Lietuviu, Macedonian, Magyar, Nederlands, Norsk, Polski, Portuguese, Ronan , Slovencina, Srpski, Suomi, Svenska, Turkish, Thai, Greek, Chinese, Russian, Hebrew.
- Net speed tweaks: Increase your net speed.
- Superfast Chrome browser included.
- New superb bootanimation.
- Enjoy!!!!
Rom Details with Download :
Device Name: Samsung Galaxy y model GT-S 5360
Release Name: JELLYBLASTV3.signed.zip
Size: 123.28 MB
Download Link(not mirrored): JELLYBLAST V3
Warnings:
This custom Rom is only meant for Samsung Galaxy y model GT-S 5360 and not for any other device. Use it at your own Risk we will not be held responsible for what ever happens to your phone following this instructional guide.
INSTALLATION GUIDE:
- Root your phone. If already rooted, proceed to the next step.(How to root or unroot Galaxy Y-click here)
- Make sure that you're on Stock kernel. Stock = Factory version ( The kernel that came while buying the phone). If you haven't changed kernel, ignore this warning.
- Remove a2sd or data2sd and format your 2nd partition if you have it.
- Place the above file to your sd card (NOT IN ANY FOLDER!!!)
- Switch off your phone.
- Go to Clockwork mode. If you don't know what is CWM, see below details. This is important, because CWM is necessary, or you won't be able to boot up with the new Kernel. Use the CWM I have given above, for best results.
- Use the volume keys to move up and down.
- Wipe data and cache and Dalvik cache.
- Now choose: Install zip from sd card.
- Choose JELLYBLAST V3.signed.zip
- Choose "yes"
- It will be Installed. Now reboot your phone. First boot will take time. Be patient.
- If you have followed EVERYTHING above carefully, you will soon boot up to your new rom.
- Please wait until media scanning is completed.
- Enjoy!!! :P
HOW TO USE CWM:
Go to stock recovery and flash this : Link or this: Link
Now you are in CWM mode. Now, in this mode, install the zip file you want...
Repeat this process every time you want to flash a file in cwm.
HOW TO GO TO STOCK RECOVERY:
Switch off your phone. Now press Power button + Home button + Volume Up button until you see the Galaxy Y logo.
Next, choose update zip from SD card and choose the CWM zip file you have downloaded above and kept in your SD card ( not in any folder).
Choose the GTS5360-cwm.zip.
Now you are in CWM mode.
INSTALLATION VIDEO BY WAHAB:
https://www.youtube.com/watch?v=Wtilrl_894A
Labels: CUSTOM ROM
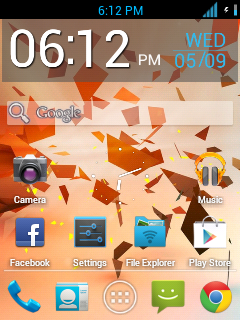
After the Release of WP8-Monochromatic 4.0 the developer of this custom pack deathnotice01 have now Released a new updated version of Monochromatic mod pack known as WP8-Monochromatic 4.5 REVAMPED. So before proceeding to installation Instruction lets have look on few screenshot of this S-Rom.
People who have ODEXED DXLF Or just people who don't know what to do :Make sure you are on stock rom DXLF
1. Download first the DXLF Deodexed Stock Rom here: DXLF Deodexed (CREDITS TO ZALONDABUZZ)
2. Install the DXFL Deodexed Stock ROM
1. When the phone is off press and hold VOLUME UP+CENTER KEY+POWER for 5 secs
2. from stock recovery select "update from SD card"
3. select "cwm_bla_bla.zip"
4. now your phone will run the CWM, go to "install zip from SD"
5. from there choose "choose zip from SDcard"
6. navigate through the folder where you have saved the DXLF Deodexed (CREDITS TO ZALONDABUZZ)[/b]
7. select "yes", wait till it finishes, then reboot system
3. Reboot the phone, and wait until it successfully boots (It will take some time)
4. Turn off the phone, Access recovery and continue to the steps below
For those using CWM Kernels (Savie's, White's, Merruk's above 1.8)
1. ENTER CWM RECOVERY BY HOLDING VOLUME UP+CENTER KEY+POWER
2. GO TO MOUNTS AND STORAGE AND SELECT MOUNT SYSTEM
3. SELECT "WP8-Monochromatic ALPHA 4.5 REVAMPED!.zip"FROM SD CARD (NO NEED FOR DATA WIPE/CACHE WIPE)
4. AND YOU ARE GOOD TO GO For Non-CWM Kernels (STOCK, Ironbuang, KURO, koneu, REPENCIS, IFRAN, TEMRA KERNELS)
1. When the phone is off press and hold VOLUME UP+CENTER KEY+POWER for 5 secs
2. from stock recovery select "update from SD card"
3. select "cwm_bla_bla.zip"
4. now your phone will run the CWM, go to "install zip from SD"
5. from there choose "choose zip from SDcard"
6. navigate through the folder where you have saved the "WP8-Monochromatic ALPHA 4.5 REVAMPED!.zip"
7. select "yes", wait till it finishes, then reboot system
[FOR ADVANCED USERS ONLY! DO WITH YOUR OWN RISK]
MERRUK'S KERNEL 2.5 OVERCLOCK 1.2GHz STABLE INSTALLATION
CREDITS TO: MERRUK-OS (PLEASE THANK HIM FOR THIS)
1. REFLASH FRESH STOCK DXLF ROM
2. ENTER CWM RECOVERY (Permanent) or (Temporary)
3. GO TO BACKUP AND STORAGE THEN SELECT BACKUP (THIS WILL BACKUP THE STOCK ROM)
4. AFTER BACKUP IS COMPLETE INSTALL EXT4FINAL.ZIP VIA CWM
5. REBOOT TO DOWNLOAD MODE AND INSTALL USING ODIN PDA.merruk.tar VIA PDA (Leave others black like Phone and CSC)
6. REBOOT TO RECOVERY, NOW YOU HAVE A PERMANENT CWM
7. GO TO BACKUP AND STORAGE THEN SELECT ADVANCED RESTORE THEN SELECT THE LATEST BACKUP THEN RESTORE SYSTEM
8. CROSS YOUR FINGERS, ONCE INSTALLATION IS COMPLETE, WIPE CACHE/DATA
9. REBOOT PHONE AND PRAY IT WILL BOOT (NOTE: BOOTANIMATION DOES NOT WORK)
10. AFTER BOOTING SUCCESSFULLY, USING ADB PUSH COMMAND TO PUSH ALL FILES FROMKERNEL_MODULES.zip
11. REBOOT RECOVERY AGAIN
12. INSTALL DXLF DEODEXED STOCK ROM
13. REBOOT THE PHONE, AND WAIT UNTIL IT REBOOTS, IT WILL TAKE SOME TIME
14. REBOOT RECOVERY
15. INSTALL "WP8-Monochromatic ALPHA 4.5 REVAMPED!.zip"
Congratulation! you have installed WP8-Monochromatic 4.5 REVAMPED on your Samsung galaxy y if you notice any bug then you can go to the thread page and provide details so that developer will fix it.
Hi Guys Seperti yang saya ingin membagikan custom rom galaxy y yang menakjubkan meurut saya,hehe :). oke langsung saja bagi kalian yang ingin mencoba silahkan lihat screenshotnya dulu dibawah ini :

Feautures OF THE ROM
1. Peningkatan menggesek untuk menghapus pemberitahuan
2. 6 lockscreens
3. Statusbar tweak + 15 matikan (EDT)
4. Fitur datang dari kernel seperti Governers dan frequecy init.d.
5. Bravia Engine terintegrasi
6. Cepat dan stabil
Feautures LAIN
Sepenuhnya Deodexed, Zipaligned.
Dihapus beberapa bloatwares.
ICS seperti aplikasi.
Gaya 5.ICS Msg pop-up
6.latest Google bermain toko.
7. Semua aplikasi google sudah diperbarui.
8. Mulus bergulir melalui cache bergulir cacat.
9. Velocity Tweaks! + Int.d tambah.
Peringatan:
Ini Rom Custom hanya dimaksudkan untuk Samsung galaxy y Model gt-S5360. Menggunakannya di risiko Anda sendiri kami tidak akan bertanggung jawab atas apa yang pernah terjadi pada perangkat Anda. Informasi yang diberikan di sini hanya untuk tujuan instruksional dan pendidikan.
Bagaimana ke Flash:
o Pada awalnya jika Anda berada di rom lainnya goto saham rom {Cara berkedip via odin panduan di sini}
o Kemudian reboot dalam mode Pemulihan Dengan menekan Volume up + tombol power + tombol home kemudian menerapkan pembaruan dari kartu sd kemudian pilih CMW. madteam. Zip
o Kemudian di cwm pilih menghapus data kemudian ya menghapus data.
o Kemudian Pilih Wipe Cache Partition maka ya menghapus cache.
o Lalu pergi ke mount and storage penyimpanan terakhir kedua di cwm kemudian pilih MOUNT & storage kemudian mount semua empat hal
mount / data, mount / sdcard, mount / system, mount / cache ..
o Kemudian Kembali dan pilih install zip dari kartu sd ... kemudian pilih zip dari kartu sd kemudian memilih Remix_v1.zip dari kartu sd .....
o Pilih "ya" menunggu sampai selesai berkedip
o Reboot sekarang
Catatan: Dibutuhkan lebih banyak waktu untuk boot pertama! jangan panik hanya menunggu.
Download Section:
Rom File : Remix_V1.zip
CWM by Mad Team : CWM.zip

Feautures OF THE ROM
1. Peningkatan menggesek untuk menghapus pemberitahuan
2. 6 lockscreens
3. Statusbar tweak + 15 matikan (EDT)
4. Fitur datang dari kernel seperti Governers dan frequecy init.d.
5. Bravia Engine terintegrasi
6. Cepat dan stabil
Feautures LAIN
Sepenuhnya Deodexed, Zipaligned.
Dihapus beberapa bloatwares.
ICS seperti aplikasi.
Gaya 5.ICS Msg pop-up
6.latest Google bermain toko.
7. Semua aplikasi google sudah diperbarui.
8. Mulus bergulir melalui cache bergulir cacat.
9. Velocity Tweaks! + Int.d tambah.
Peringatan:
Ini Rom Custom hanya dimaksudkan untuk Samsung galaxy y Model gt-S5360. Menggunakannya di risiko Anda sendiri kami tidak akan bertanggung jawab atas apa yang pernah terjadi pada perangkat Anda. Informasi yang diberikan di sini hanya untuk tujuan instruksional dan pendidikan.
Bagaimana ke Flash:
o Pada awalnya jika Anda berada di rom lainnya goto saham rom {Cara berkedip via odin panduan di sini}
o Kemudian reboot dalam mode Pemulihan Dengan menekan Volume up + tombol power + tombol home kemudian menerapkan pembaruan dari kartu sd kemudian pilih CMW. madteam. Zip
o Kemudian di cwm pilih menghapus data kemudian ya menghapus data.
o Kemudian Pilih Wipe Cache Partition maka ya menghapus cache.
o Lalu pergi ke mount and storage penyimpanan terakhir kedua di cwm kemudian pilih MOUNT & storage kemudian mount semua empat hal
mount / data, mount / sdcard, mount / system, mount / cache ..
o Kemudian Kembali dan pilih install zip dari kartu sd ... kemudian pilih zip dari kartu sd kemudian memilih Remix_v1.zip dari kartu sd .....
o Pilih "ya" menunggu sampai selesai berkedip
o Reboot sekarang
Catatan: Dibutuhkan lebih banyak waktu untuk boot pertama! jangan panik hanya menunggu.
Rom File : Remix_V1.zip
CWM by Mad Team : CWM.zip
Minggu, 30 Desember 2012
Cara Instal + Setting Chainfire 3D
Tools yang harus didownload :
1. Chainfire 3D dan pluginnya. DOWNLOAD
Cara install :
1. Instal Chainfire 3D di Galaxy Y.
2. Unzip file Plug-ins.zip di SD Card.
3. Buka Chainfire 3D dan klik "install Plugin".
4. Tunggu sebentar sampai aplikasi selesai mencari plugin di HP androidmu.
5. Setelah itu, install semua plugin (libGLEMU_NVIDIA, libGLEMU_POWERVR, libGLEMU_QUALCOM).
6. Done.
Cara pakai :
1. Buka Chainfire 3D.
2. Klik "Default OpenGL settings".
3. Centang "reduce text quality".
4. Klik "use plugin".
5. Pilih "QUALCOM".
6. Minimize Chainfire 3D (caranya tekan tombol home).
7. Mainkan game HD.
Need For Speed (nfs) Hot Pursuit Touch Controls Fixed For Samsung Galaxy Y 100%worked
kali ini ane mau share game android HD untuk android yang juga bisa work di galaxy y. Game ini sudah di fixed,sehingga sobat tidak bingung lagi menekan tombol yang ada di game. dan game ini sudah ane coba, 100% berhasil berjalan di galaxy young punya saya. sebenarnya game ini tidak bisa dimainin digalaxy y, karena galaxy y tidak punya GPU seperti android kelas atas lain. yaudah dah, gak usah bertele-tele mari kita mulai stepnya sekarang :
sebelum game di install, maka sobat wajib download filenya dulu di
::.Downloads.::
APK:http://tinyurl.com/mediafirenfshtapk0
Data:
Part1:http://tinyurl.com/mediafirenfshtdata1
Part2:http://tinyurl.com/mediafirenfshtdata2
- Setelah Anda download semua linknya secara lengkap, extract data part1-part2 jadi 1 dengan winrar.
- Copy apknya dulu ke sdcard lalu install (jangan copy datanya dulu!!)
- Setelah apk terinstall, buka gamenya
- Anda akan disuruh download dulu, ikuti maunya
- Lalu cancel download dan keluar dari game
- Sambungkan lagi HP ke PC dan lihat apakah ada folder baru di sdcard/Android/data/(com.ea.nfshp)
- Jika ada, maka itu adalah folder bawaan ketika Anda membuka gamenya.
- Hapus folder itu dan masukkan folder data yang sudah Anda download tadi ke sdcard/Android/data/(disini)
NB: Anda juga bisa langsung me-replace folder lama tersebut ketika dicopypaste. - Setelah selesai paste data ke sdcard, cabut HP dari PC
- sebelum memainkan game, sobat perlu install chainfire 3d dulu. agar gamenya tidak jadi berwarna putih untuk cara install chainfire 3d bisa dilihat disini cara install Chainfire 3d


